Tuesday 28 May 2013

AKB0048 Photoshoot

Konbanwa minna!

Guess some of you might have guessed that I'll be cosplaying as one of the members from AKB0048 since I was doing my AKB0048 mic tutorial in my previous post.

SO YESSS, finally got a photoshoot for AKB0048. Has been delayed for quite sometime LOL XDD

Okay, before we move on with the photoshoot.

For sure, there are lots of things that you need to prepare before the shooting, for example.....

props, costume and wig preparation. 

Tada here's mine!


Can you guess what character I'm cosing? o(≧∇≦o)

Those who watched the anime should have known. It's Kanata Shinonome!

I really like Kanata character in the anime. She always puts other people first before herself. Not like my character is any similar with hers LOL ┐( ̄ヮ ̄)┌. I think my character is more like Sonata Shinonome LOL. XD

OK, before we even proceed to a proper shoot. Costest is also very important. Kanata wig is seriously pain in the @ss!!!! SOOOO HARD to style and I looked like Lion King (; ̄Д ̄)


Urghhh I failed being Kanata LOL. Gomenasai Kanata-chan m( __ __ )m

OK move on to photoshoot!!!

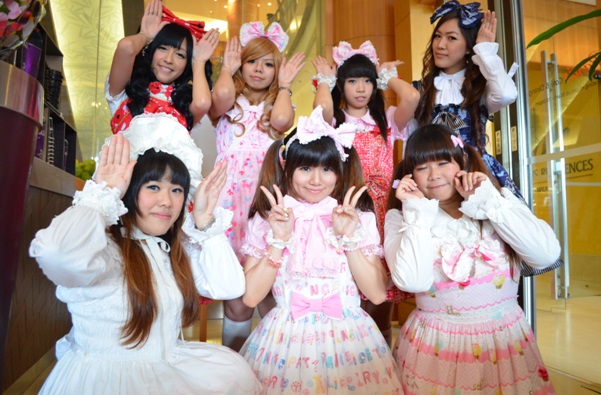
Wonder who are the rest of the members? 

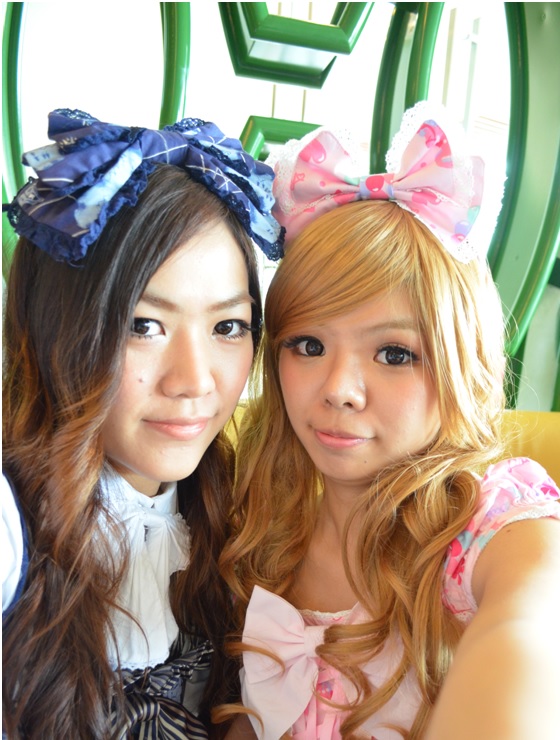
Well, they're our usual kawaii girls from the Lolita Group! (*´▽`*)

This is my first ever cosplay photoshoot (previous shooting is always a casual shoot), so I SUPER SUPER 'kan cheong' (nervous).

First ever photoshoot already started with 4 expert photographers LOL  Σ(゚д゚lll)

Throughout the whole shooting, I feel like a noob!!! Don't even know how to pose, smile or laugh. ╥﹏╥

Sorry for not posting any pictures during the shooting process. I didn't bring my camera with me, plus I don't have time to syok sendiri. 

Anyways, here are some of the photos of my AKB0048 cosplay photoshoot session with 4 different photographers.


Kenkyuusei (understudies)


Feel free to peek at any pantsu that you like (bloomer/petit)..hahaha XDD


SUPA loving the heart shape~~ <3

 Photo by H.T Production

Awesome shoot with awesome color!!  ヾ(@°▽°@)ノ


Overall, I'm really happy with the photoshoot session. Even though it was super tired (shoot from around 3.30pm to 10.30pm) but was super fun! \(*T▽T*)/

Due to my lack of experience in photoshooting, I hope I'll be able to improve in the next shooting and was grateful to all the photographers who are very patient and nice! (ღ˘⌣˘ღ).
They magically transform all of us into super kawaii~~!! Ehem..ehem..tak tau malu  ヽ(*≧ω≦)ノ

Of course I would like to thank all my kawaii team members for making this shoot a success. Thanks for all the help with the costume, props and everything (from making/wearing props and costume to wig styling/makeup). Me super super heart all of them~~~<3 <3 (´ω`♡%)

Lastly, I would also like to thanks all the saikang (helpers) for taking care of our belongings and providing us drinks. Without you guys, we will be in a pinch >A<

Guess that's it for today. 

Hope to have more photoshoot next time! о(ж>▽<)y ☆

Reported by Kanata Shinonome =ppp


Wednesday 15 May 2013

Springtime Lolita Tea Party

Hello!

Hikari desu!

This post was about springtime gathering. Guess now it doesn't count as spring anymore LOL. OTL

Summer is on its way~~<3

Not that it made much difference in Malaysia since it's always summer here for 365 days. =___=

We finally have another gathering after the last one which was during Halloween.


This time the gathering was held at Pastis Cafe, The Gardens shopping mall.

The food there was alright but the taste is not worth the price. A little pricy (for a cheapskate like me XDD) for the 'alright' taste. However, the service was good! The staffs are friendly and nice.

I ordered a half chicken dish (cannot remember the name of the dish). Gomen m( __ __ )m


Didn't upload much photos because I rushed to the gathering after work and I was super super tired. ~o~

The tea party this time is better because lots of kawaii girls attended to the gathering making it livelier ヽ(´―`)ノ


This time some of the boys also attended for the gathering. Picture of them was not taken because they are the photographer for the picture above LOL. Ψ(`∇´)Ψ

As usual, gathering is all about taking pictures and syok sendiri~~!


The 'idol' group wannabe~~~ XDDD

More syok sendiri moments


With so many lovely girls around, purikura is a MUST!! (´~`)

We even trolled during purikura session.


Our imitation of the purikura models were such a BIG FAILURE. OTL (´;ω;`). They're too pretty to imitate~~!!

JANG JANG!! Here's our kawaii purikura photo!!


Last picture for today's post.

LOLITA in action~~


Don't mess with LOLITA!!! (;゜ロ゜)

OK that's it for today.

Oyasumi! (-_-)zzz


Wednesday 1 May 2013

AKB0048 Mic DIY part 2

Konnichiwa minna,

It's Labour Day today!!!

Hope everyone is enjoying their holiday! (´~`)

Continuation from the previous post.

I have made another mic. The size and the shape of the mic is VERY DIFFERENT compared to the previous one. OTL  (╥_╥)

Since the mic from AKB0048 looked rather thin compared with my first mic. I tried to slim it down but the second one looked TOOOO THIN. @.@

Nevertheless, I'll still go through my DIY process.

What u need to do at first is to measure your cardboard. The measurement really depends on how you want your mic to be shaped like.

I used 8cm and 12cm width. For the height is roughly 15cm. 


After that, cut them out and make a cylinder roll. Glue them together and you should get something like this. This will be the handle for the mic.


Draw a curve shape for the top part of the mic (need 2 of these cut out). I used 3cm for the width and for the length was around 15cm.

Cut them out, roll them into cylindrical shape and glue them together. 


You'll get something like this (2 of these).


Glue the top part of the mic with the handle.

After that, glue the second cylinder on the top part of the first cylinder.

You'll get something like this.


After this, you'll need to make a strip and glue it in between the head of the mic.


Since my mic is very uneven OTL, I used hot glue to stick the strip.


Lastly, cut a circle and glue it to the head of the mic. I used hot glue for this as well. XD


And TADAAAAA!!! It's done!!


This one definitely looked FAILED compared to the previous one. But the process is roughly something like this. You just need to have a suitable measurement. Maybe my measurement was way too OFF.

Honto ni gomennasai!! m(_ _)m

After that you can start coloring or spraying your mic.


I hope that it helps LOL. 

That's it for today! 

Bye Bye!  \(^ ^)/